
Intro #
A few months ago I received a box of old family microcassette tapes along with a microcassette recorder. Microcassettes were first made back in 1969 so they were used for audio recordings before CD’s and digital audio.
I wanted to digitize these microcassettes but found information fairly sparse in some parts so wanted to document what I learned and how I did this mini-project. What really helped kickstart my effort was this article which walked through the actual digitization process but before I got that far I needed to take a few steps.
Things needed #
-
A working Microcassette recorder/player
-
A USB analog capture card (might also be called a USB Video Audio Converter)
-
a 3.5mm AUX to RCA audio cable
-
Audacity software
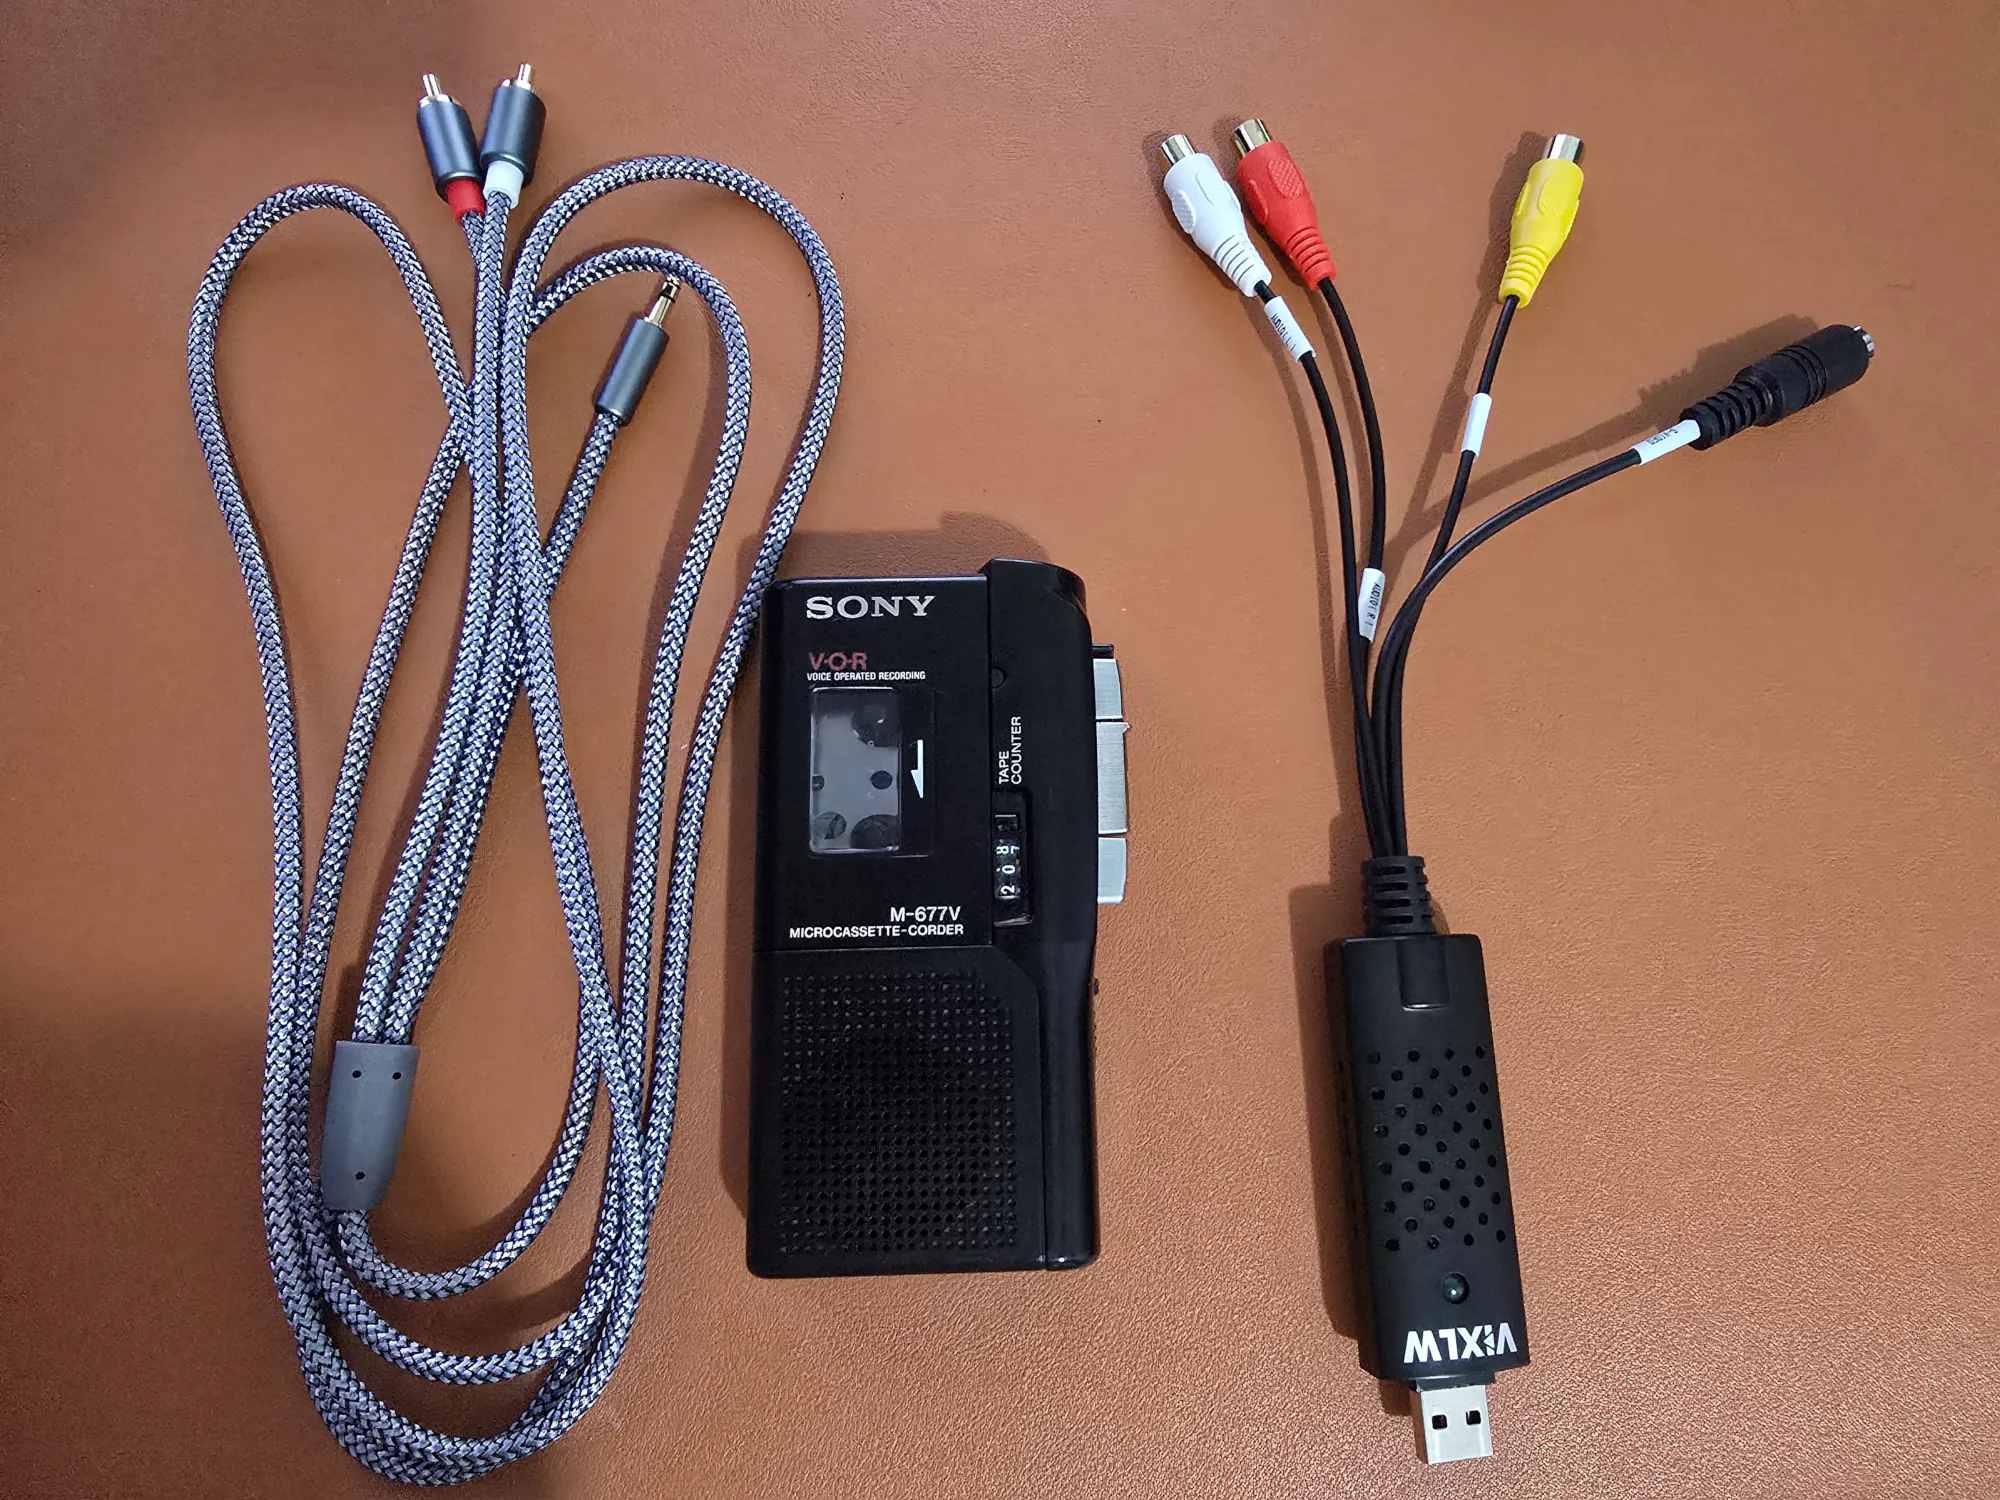
Left to Right: 3.5mm AUX to RCA audio cable, a microcassette recorder, a USB analog capture card
Things I learned while researching #
There’s a few things I learned about microcassettes and their recorders while looking into this project or during it:
- Microcassettes had two different speed settings that they were recording at. One speed resulted in 30 minutes audio per side, and the other speed resulted in 45 minutes audio per side. A Microcassettes recorder/player ideally supports playback for both speeds
- The Microcassette players are analog devices meaning for them to work they used small rubber belts that controlled how quickly a cassette was spun during recording or playback.
- Those belts don’t last forever and will degrade over time, This can result in the audio being captured or played back either more quickly or more slowly depending on which belt is worn out. If your belts are really old, they can even rot.
- Similarly, the tape within the microcassettes can degrade over time, meaning if you have a box of these (or any other old VHS tapes, cassettes, etc) then converting them sooner than later is wise.
- The microcassette players do need to be cleaned every now and again for best quality. This involved using q-tips and some isopropyl alcohol.
Repairs first #
I first followed the guide I shared earlier but quickly found that the audio I was getting was distorted (fast, high pitched). This is where I learned that the microcassette belts can wear out, which is a common problem given these devices aren’t being made anymore so any device you do find is old. Even if the recorder package is sealed, the tension of the belts still could’ve been worn out in the 25+ years the device has been sitting in someone’s storage.
I did have the original booklet for my microcassette recorder, the Sony M-677V, but the book made no mention of any repairs or replacements. I carefully took apart the device, making sure not to damage any wires, and I moved the circuit board out of the way to expose the belts. Looking at the belts, one of them was visibly loose. I was able to purchase a replacement on ebay for my specific microcassette recorder that ended up working as expected–meaning that playback audio did not sound too fast or slow with the new belt installed.
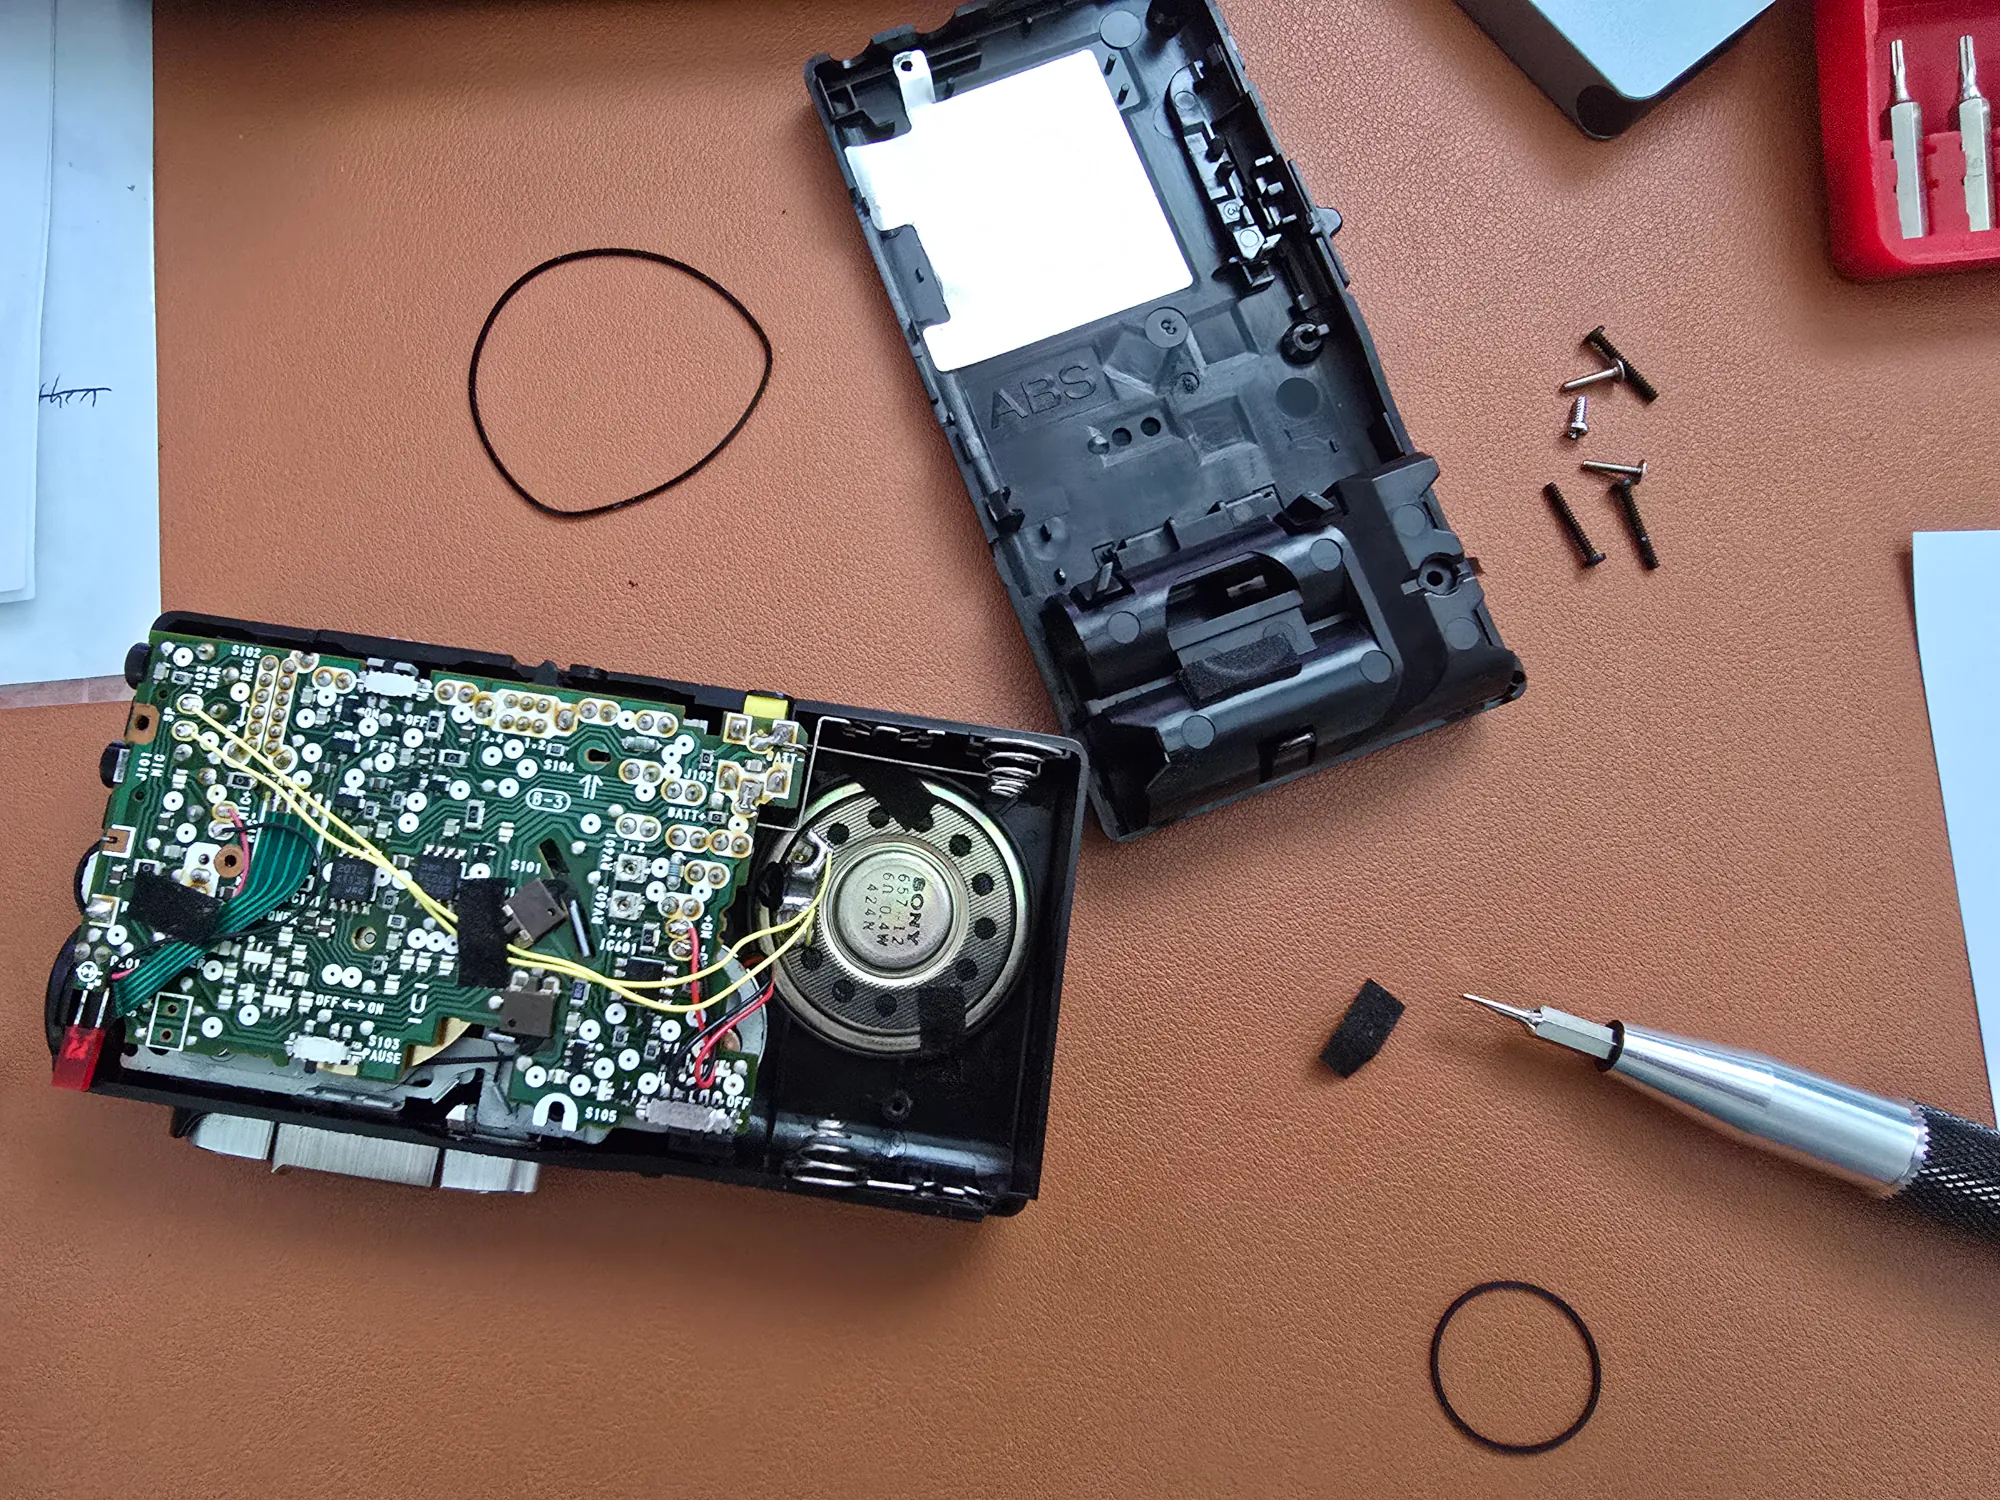
This is also when I took the time to clean the tape head with a q-tip and isopropyl alcohol (you can also try rubbing alcohol but there is potential for residue so)
Digitizing #
With my 1994 microcasette player now functioning properly, I was able to begin the conversion process:
-
I plugged my 3.5MM AUX to RCA audio cable into the USB capture card, and then plugged the USB capture card into my computer.
-
Opened Audacity
-
Navigated to
Audio Setup->Recording Device. Look for your capture card. The name will vary but might reference USB in the name. If you do not see it, go toAudio Setup->Rescan Audio Deviceswhich is needed particularly if you plugged in the capture card after launching Audacity. -
I went to
File->Preferences->Recording->Audible input monitoringand enabled it. I highly recommend this if it is not already enabled. This allows you to listen to the audio as you are capturing it. I found being able to listen to the audio while capturing useful for a few reasons:- Audio volume is not always consistent–some parts may be really quiet and other parts really loud. If you catch it as it happens, you can adjust the audio on your microcassette player. You can always correct this one in Audacity post-recording too, but I found it easier to just do it as I went.
- You’ll be able to tell if the microcassette player’s battery is starting to fail because the playback speed decreases and your audio will sound off
- If the microcassette was recorded on one speed and then changed to another speed mid-recording then you’ll be able to tell that the playback speed has changed (and update the speed setting on your microcassette recorder).
-
I enabled
Audio Setup->Recording Channels->Mono(your microcassette player is a mono audio channel with out Left/Right audio. ) -
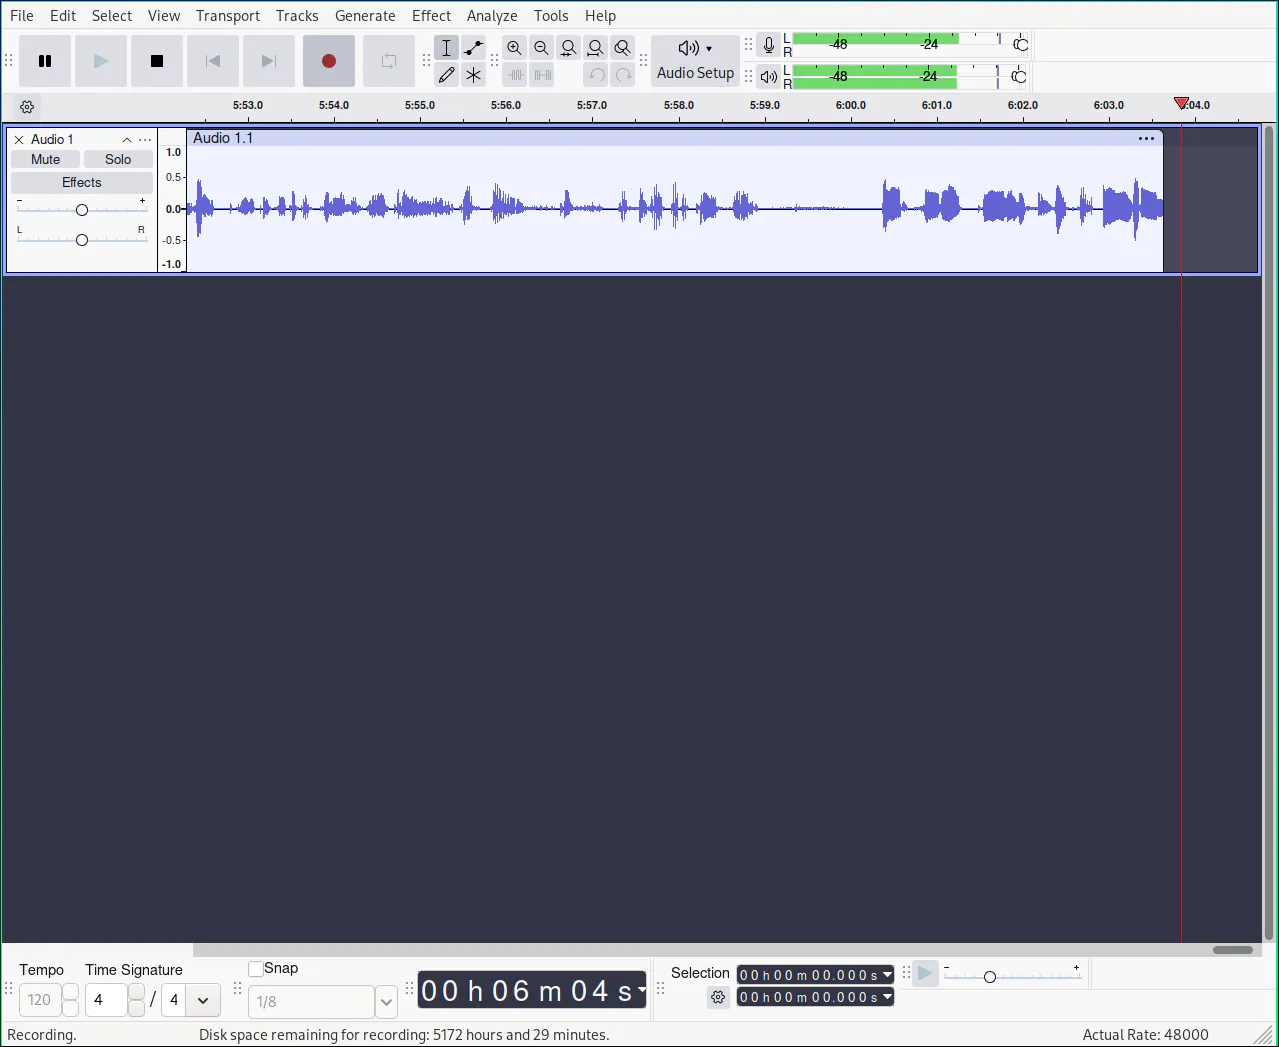
Pressed the red recording button in Audacity, and then pressed the play button on my microcassette recorder. If you’re using the
Audible input monitoringthen you should start hearing the audio come through your computer. Make sure to adjust the audio volume level on the microcassette recorder so that the audio is as clear as possible. Louder is not necessarily better, since at least on my microcassette recorder playing at max volume made the audio muffled. The volume can always be boosted or normalized in post-recording if needed.
-
Once recording is completed, press the Stop button. You can save the Audacity project for editing later, or since I listened to the audio as it occurred, I was happy with the results and just exported to .mp3 right away.
File -> Export Audio. Pick an audio format and audio options that make sense for you. For me I used .mp3 withPresetbit rate mode, andstandardquality (170-210 kbps). -
Rinse and repeat! I had a box of microcassettes so this process took me over a week to finish. I did other work while passively listening to the tapes. I didn’t need to actively listen to everything going on and only needed to listen enough to know if one of those problems I mentioned (#4) occurred.
-
Since these were family recordings, I observed a 3-2-1 backup strategy by making sure I had 3 copies of the audio files saved: two at home but on separate devies (my computer and a separate device-my NAS), and third copy on off-site storage. This is how any irreplaceable digital files should be stored to cover cases where one or more devices fail at the same time.
Conclusion #
In the end I was able to get dozens audio recordings saved. Many of them weren’t important, but some were believed to have been lost many years ago.
While there are some digitizing services out there, they were prohibitively expensive for the number of tapes I had. The hardest part of this project was just getting the microcassette player in working condition which was not too bad. After that, the rest was just a matter of time.